
Zoom Kit for Handling Unwanted Meeting Disruptions
Pro-Tip: All districts, facilities or groups are encouraged to have both a Zoom “Host” and “Co-Host” in every meeting as service positions. One host acts as the traditional chair while the other manages muting & hand raising, and can be free to handle meeting intrusions. Click here for details on assigning a Co-Host when your meeting has begun (No special setup needed, Tricounty Intergroup accounts already allow for Co-Hosting!)
What should you do if your meeting is disrupted?
– Mute All Participants and Disable Self-Unmuting
– Turn off a Participant’s Video and Remove Participant
– Locking a Meeting
– Preventing “Zoom Group Chat” Abuse
– Preventing “Share Screen” Abuse
1. Mute All Participants and Disable Self-Unmuting (Stop The Noise!)
a. Click the “Manage Participate” icon (Yellow arrow below)
b. Click “Mute All” (Red arrow)
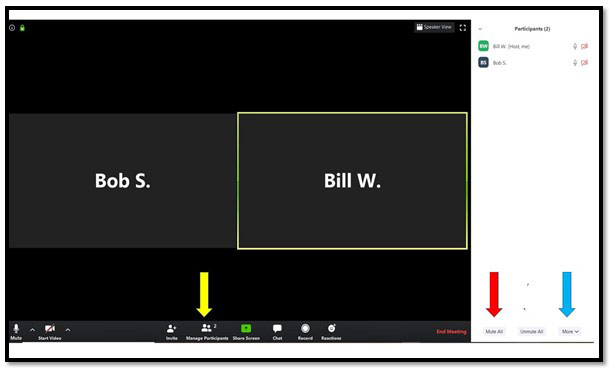
c. Click “More” (Blue arrow)
d. Uncheck “Allow Participants to Unmute Themselves”
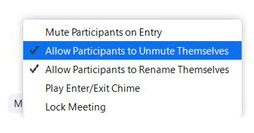
Note: Hosts will then have to unmute Participants anytime that they wish to speak when the meeting resumes.
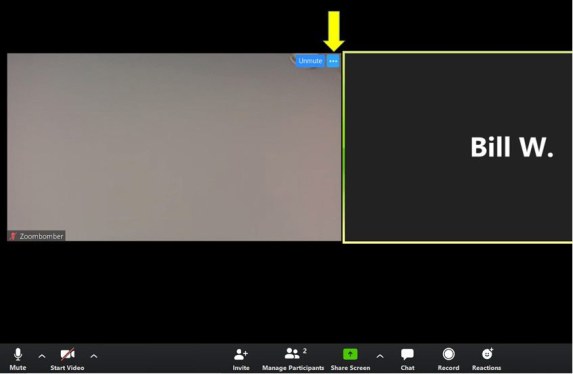
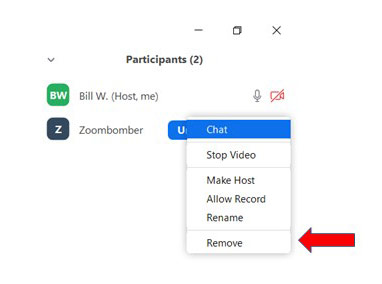
2. Turn Off a Participant’s Video and Remove Participant
a. Identify the disruptive participant(s) and hover your mouse over the right corner of that person’s video
b. Click the blue square with three white dots (Yellow arrow below):
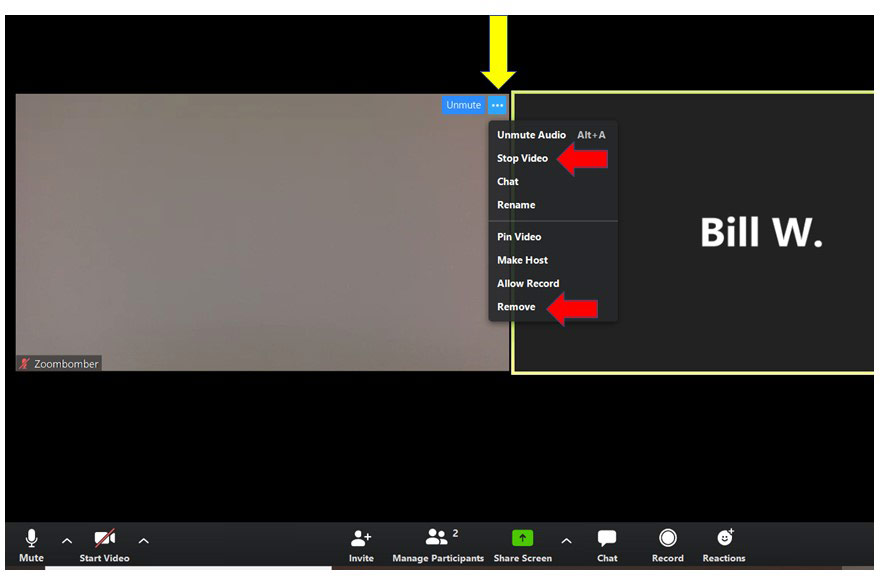
c. A list of options appears (Yellow arrow below)
d. You may stop the video of the participant and/or remove the person from the meeting (Red arrows)
e. After removing, proceed to step 3 as disruptors may simply rejoin the meeting if you don’t continue to secure the session in progress
f. You will also find the “Stop Video” option and “Remove” option (Red arrow below) by hovering your mouse over the names in the Participants list on the right side of your screen and clicking “More”
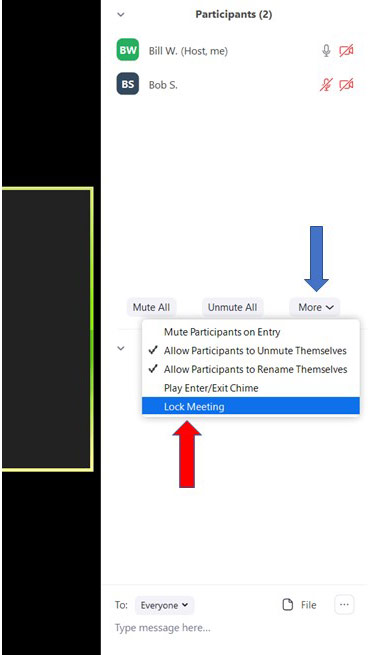
3. Locking the Meeting
a. To lock a meeting and prevent anyone from joining the meeting for that session, click “More” under the Participants list (Blue arrow below), which will bring up the option “Lock Meeting” (Red arrow)
b. Please note after the meeting is locked, no one will be able to join the meeting. The policy of locking a meeting may be a matter to be taken up in a Group Conscience
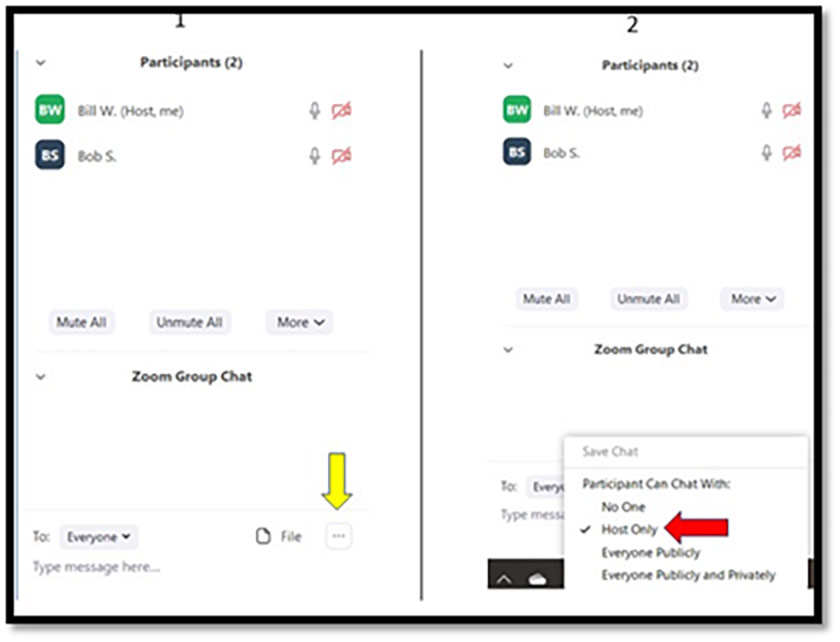
4. Preventing “Zoom Group Chat” Abuse
a. Many groups have elected to change the settings on the chat box to enable Participants to send messages only to the Host
b. To restrict chat, click the three dots at the bottom of the chat box (Column 1 below, yellow arrow) and select “Host Only” (Column 2, Red arrow):
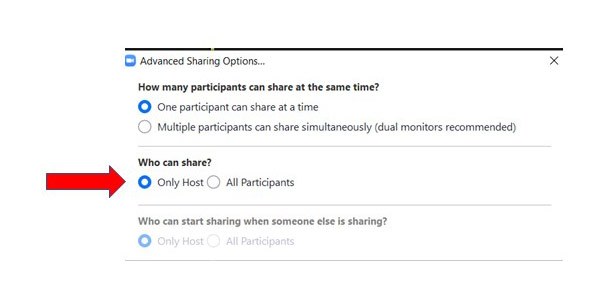
5. Preventing “Share Screen” Abuse
a. To prevent “Share Screen” abuse, many groups allow only the hosts to share their screens. To limit the ability to share screen…
b. Click the arrow next to “Share Screen” (Blue arrow below)
c. Select “Advanced Sharing Options…” (Yellow arrow).
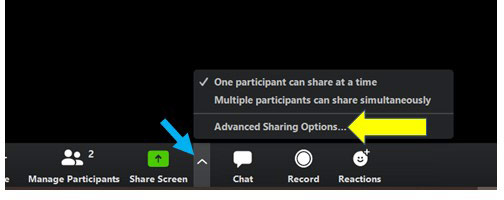
d. Selecting “Advanced Sharing Options…” brings up the dialog box below. Select “Host Only” (Red arrow)
Remember: These tools are all designed to help your group protect yourselves from intrusions, but there is no one-size-fits-all solution. Please arm your Chairs and Hosts with this information, and discuss in your groups what will work best for your needs. We will continue to evolve guidance for the community as new information becomes available.
When anyone, anywhere, reaches out for help, I want the hand of A.A. always to be there.
And for that: I am responsible.